Back to 'Digital microscopy'
Removing dust-specks and other artifacts from digital images
including a demonstration
Ideally, there would be no need to have methods for removing artifacts from for digital or film-based images, caused by dust or imperfections in the glass of lenses, etc. However, few microscopists work in clean rooms and some dust is inevitable. Published photographs of microalgae often include extraneous material or artefacts of illumination that detract from their quality and utility.
Digital imaging allows imperfections to be removed much more easily than from silver-halide photographs (older microscopists will remember touching in white dust specks on prints with tiny brushes and dye. Digital image defects include unevenness of illumination, dust particles on optical surfaces between the specimen and the CCD chip, and texture in coatings on these surfaces. Unfortunately, dust particles on camera chips are a especially common problem in imaging, owing to electrostatic charging of the chip itself or its protective screen; they can rarely be avoided altogether. However, most of these systemic problems affect all images taken at the same microscope magnification equally, and so they can be removed relatively easily by using any software that is capable of image arithmetic. I illustrate this below, using ImageJ freeware.
Other imperfections are intrinsic to the specimen preparation itself. These can include other diatoms, debris or faults in the mountant. Much of this can be removed manually from digital images using image editing software such as the tools in Adobe Photoshop. Some examples are given in Bayer, M.M., Droop, S.J.M. & Mann, D.G. (2001). Digital microscopy in phycological research, with special reference to microalgae. [ Phycological Research 49: 263-274]
A demonstration
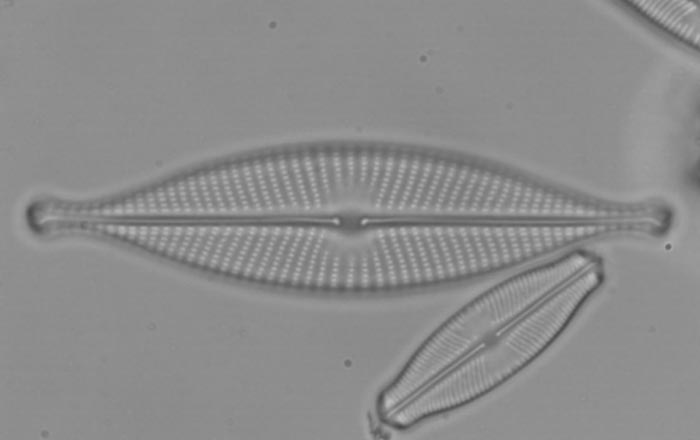
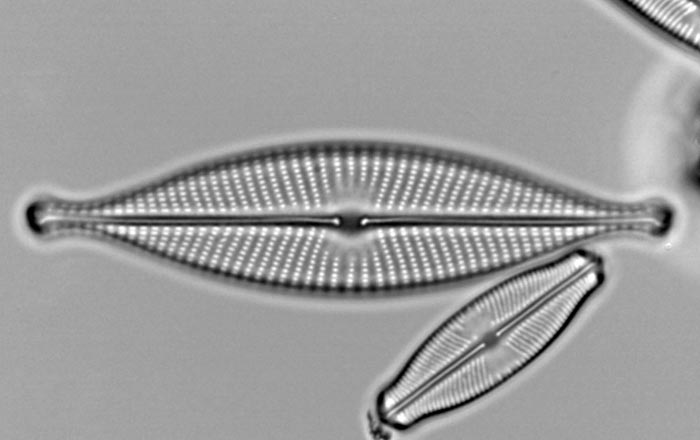
Here is an uncorrected raw image, from the microscope, showing Navicula and Sellaphora valves. The contrast is low, but it is a usable image. However, many small specks are visible, caused by dirt along the optical path.

After adjustment of contrast and brightness, using an image processing program (whether this is sophisticated, e.g. Adobe Photoshop, or basic, e.g. IrfanView), the images of the diatoms appear 'better'. In fact, there is no improvement in resolution, but the details are easier to see. Unfortunately so are the many dust specks and a faint horizontal banding becomes evident, caused by a fault in our digital camera.
We might care to try to work out where the dust is, so that it can be removed. If the dust remains in the same place in the image when the camera is rotated with respect to the microscope, then the specks are on the camera. If they rotate with the image of the specimen, then they are in the microscopeand it may be worth getting in touch with the service engineer. However, check first that you really have achieved Köhler illumination because, with a properly adjusted illumination system, most intermediate images within the microscope will not coincide with lens surfaces or other surfaces and dirt artifacts will be minimal.
The horizontal banding artifact is now very obvious too.
Removing the artifacts
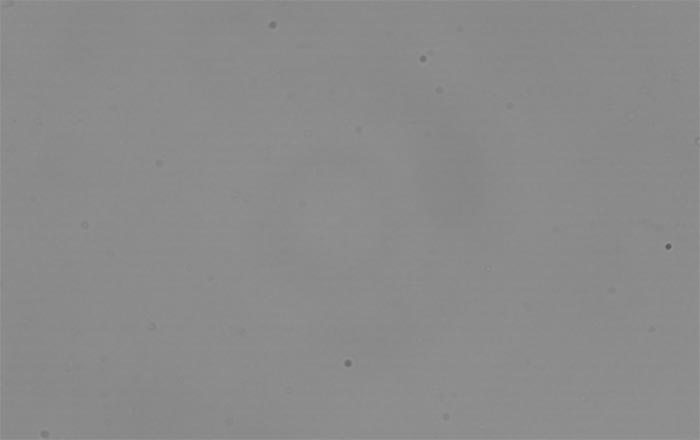
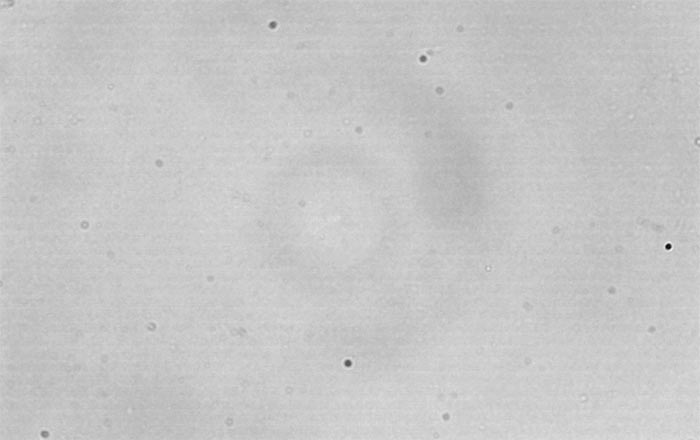
The dirt and other artifacts can be removed from the original image of the Navicula and Sellaphora valves by image arithmetic. All you need is the freeware image analysis program ImageJ. Once this is installed, open the original image and the image of the background noise. These must be the same size: each pixel must correspond to one and only one pixel in the other image. And they must have been captured using the same settings of contrast and brightness, so that they differ only in that one contains an image while the other contains extraneous noise and image artifacts (we give a slightly different method in Bayer et al. 2001, based on use of Optimas Image Analysis software).In ImageJ, choose Process, Image Calculator. Enter the name of the uncorrected image in Image 1, enter the name of the background image in Image 2, choose Divide as the operator, tick the box marked 32-bit Result and perform the operation. Then choose Image, Type and 8-bit. This returns the image to something you can use in image editing programs. Finally Save the new, corrected image.
The effects can be seen in the next series of images.
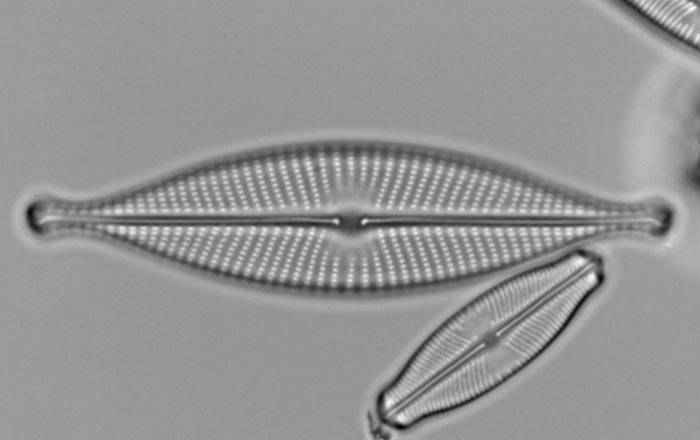
Here is the corrected image, before any further enhancement. This is what you get by dividing the uncorrected raw image shown above, divided by the unaltered raw background image. All the dust specks have gone.
This is just the starting point. Now you can improve the contrast further, either in ImageJ or in software such as Adobe Photoshop. Adjustment yields this image:
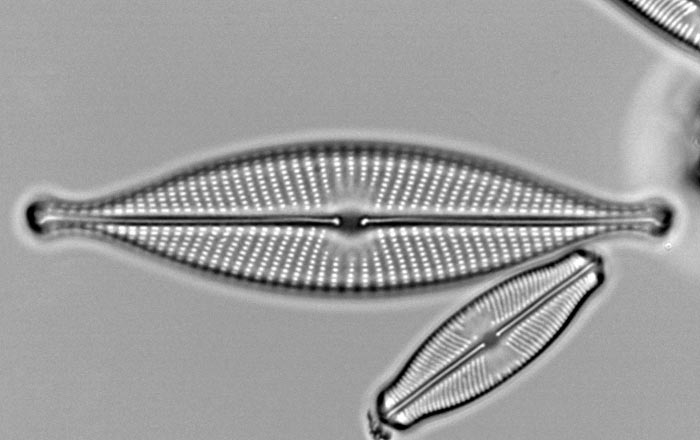
And you may wish to perform judicious sharpening, using Unsharp masking, again using some suitable software, such as Adobe Photoshop. In this case the improvement is small: